2. Select > Load Selection
(Choose Layer Transparency)
3. Layer > Flatten Image
4. Select > Inverse

5. Filter > Pixelate > Crystallize (cell size 4)
6. Select > Inverse

7. Noise > Add Noise
(Guassian, Monochromatic, Amount. 70)

8. Blur > Guassian blur (Radius 2.0)

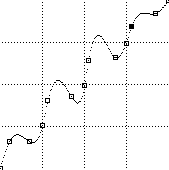
9. Image > Adjust > Curve
(make the curve as shown in fig.)

10. Press Ctrl + D to deselect
11. Image > Adjust > Invert

12. Image > Rotate Canvas > 90 CW
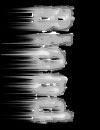
13. Filter > Stylize > Wind
14. Method : Wind Direction : From the Right

15. Image > Rotate Canvas > 90 CCW
16. Image > Mode > RGB
17. Image > Adjust > Hue Saturation
18. Click Colorize
19. Drag the Saturation slider to 100
20. Drag the Lightness slider to -5

Oke. go work now. Make your original blood picture.
and good luct.
 About the Author : Andra Permana Halim. I love Design Grafis and all about Design and Art. Work in Neomatix Corporation as Pro Model. And This is My Design Blog. Thanks for visit to Andrastorm Design Studio. I like You..!!!


0 comments:
Leave your Comment